
If you live in the US, you’re probably not going to be impressed by this, but I’m Australia, and the exchange rate and shipping costs do not favour me, so this outfit is inspired by Madewell. I browse the site all the time, but have only ever owned two tank tops I bought on a trip to the states a few years ago. Instead I pin and pin and hope that I’ll find jersey as soft as theirs and look for patterns that might help me recreate that relaxed, modern casual vibe for myself.
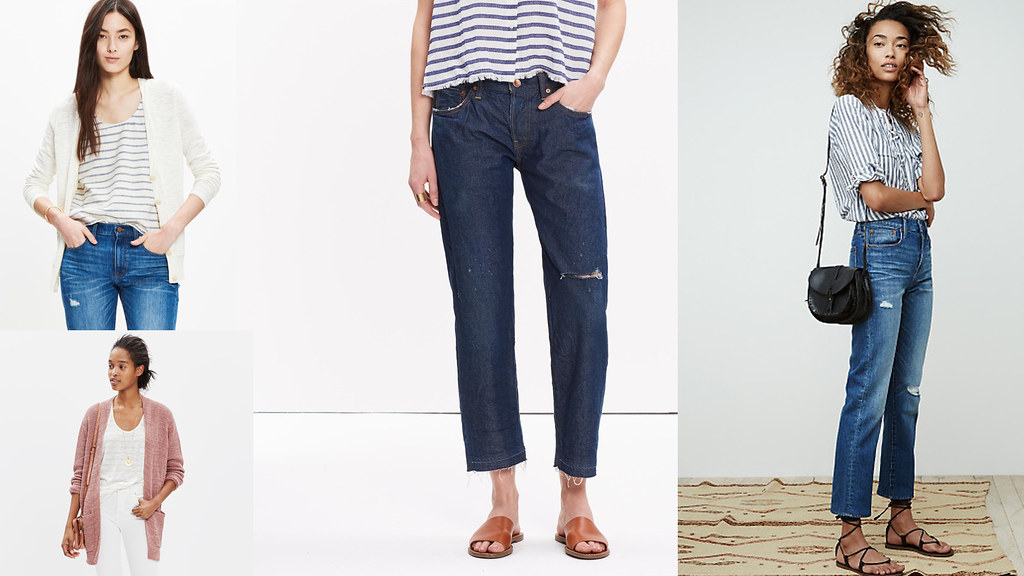
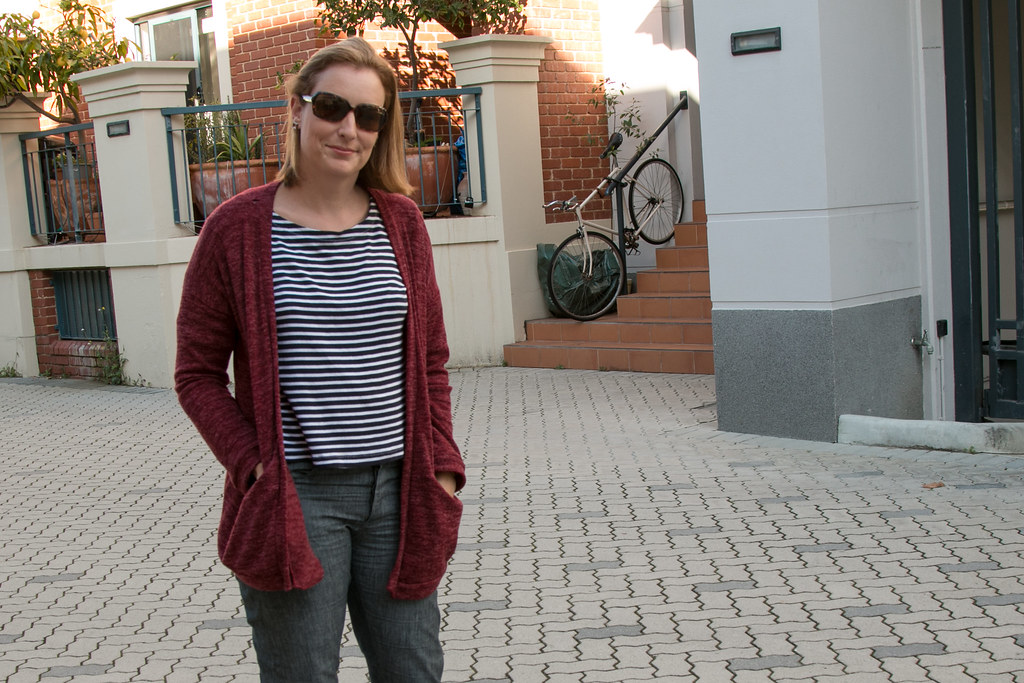
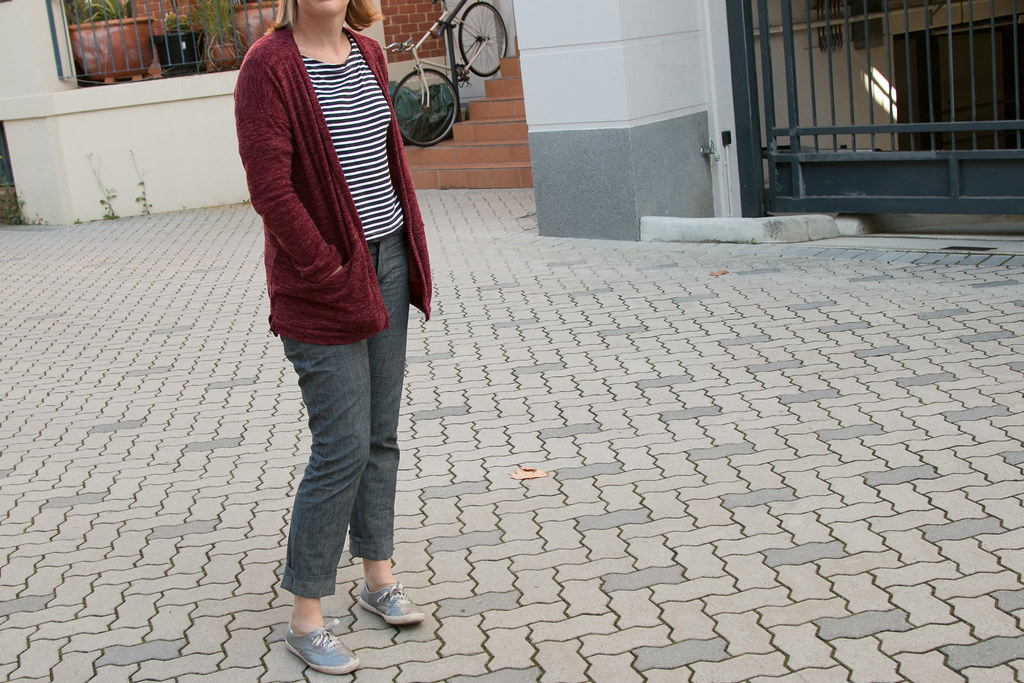
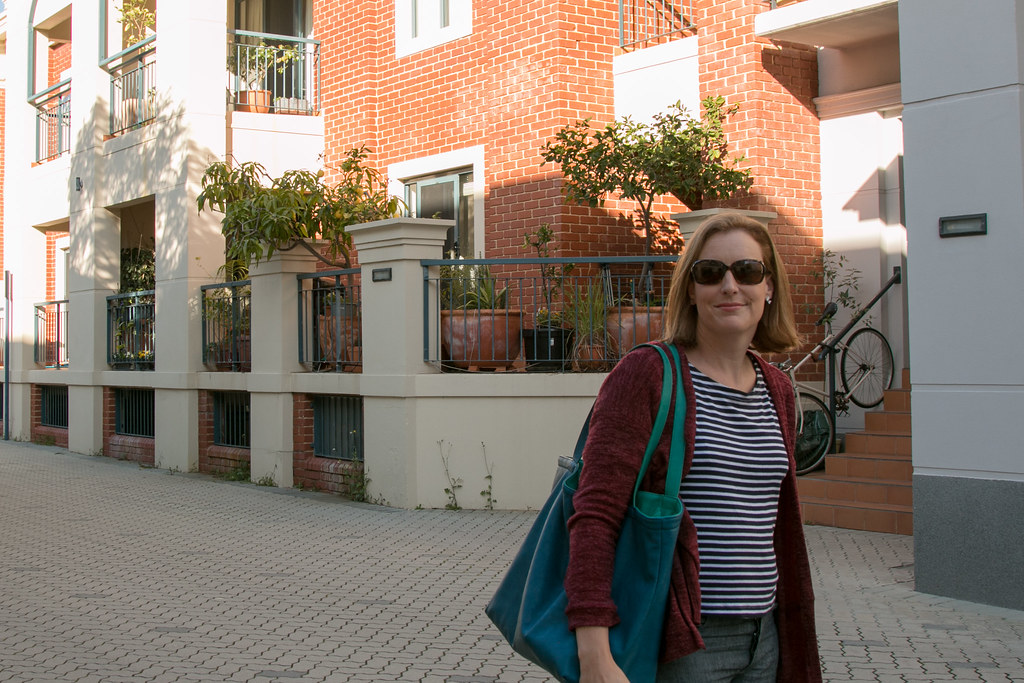
So what do I have here? It’s the cardigan I made in the one pattern, two ways challenge, a Grainline Driftless cardigan in a maroon mystery-poly knit. Then there’s a Liesl + Co Maritime top in a navy and white stripe cotton knit and the real star of the show – the not-long-released Closet Case Files Morgan jeans.
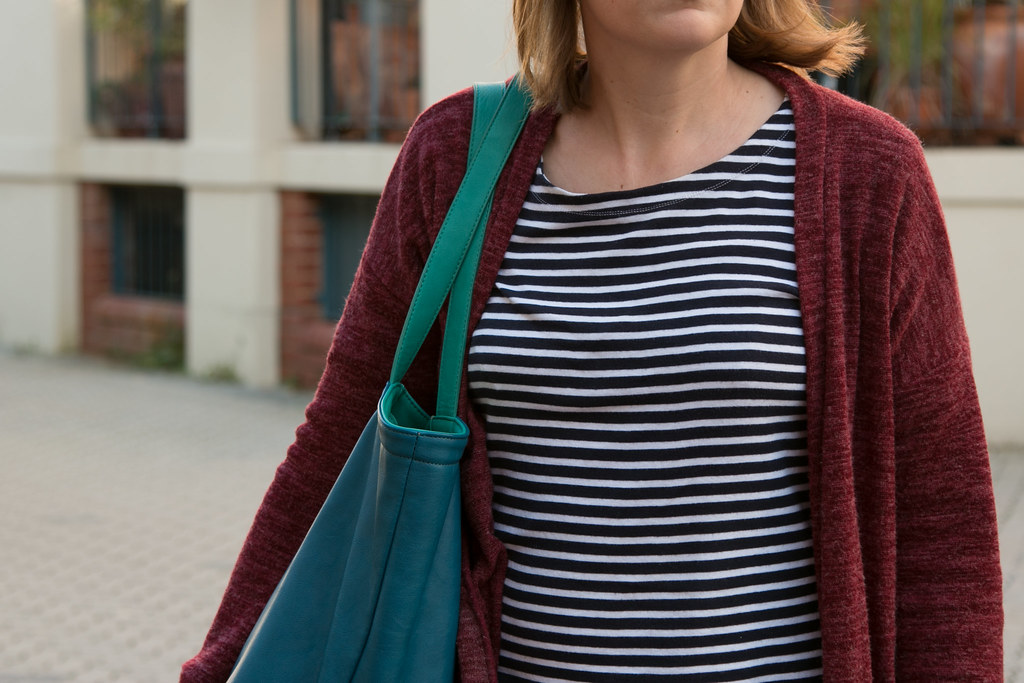
How much can you really say about a T-shirt? It’s a boat neck, elbow length tee with a side-split hem, the neckline is finished with a facing.
It came together easily, as with all the Liesl + Co patterns I have tried the pattern is drafted well, fits according to my measurements and the instructions are excellent.
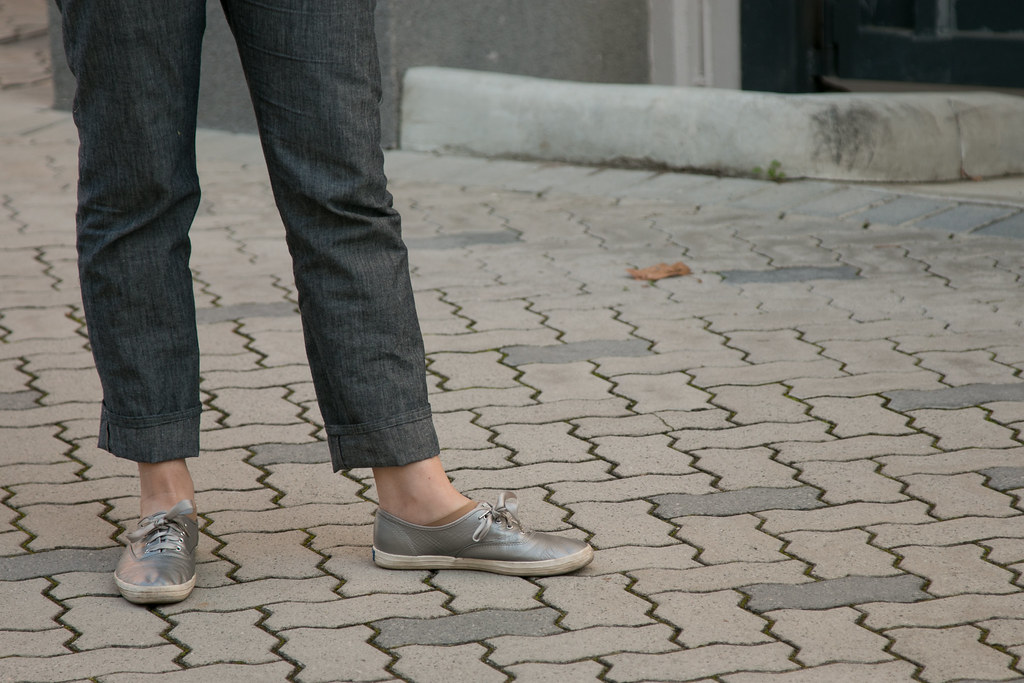
The jeans were much more of an adventure. It’s not my first pair of jeans, but I have only made one pair before this is the first time I have used a Closet Case Files pattern. To my surprise it was a pretty straightforward sewing experience, with little unpicking or head scratching, and I love how ready-to-wear they look once finished.
The fabric is rope-dyed lightweight denim from a place called Potter Textiles in Perth. I cut a size 12 and didn’t make any changes to the pattern.
Overall I found the instructions really good. I didn’t have a clue how the button fly would go together but I found that by faithfully following the instructions as written, it all came together in the end. This is the first time I’ve been able to follow a pattern’s fly front instructions without having to look up a youtube clip or a sewalong.
A few fitting hitches once I tried them on. The back yoke was gaping badly (a common thing for me) and the legs were way too tight. I let the side seams out as far as I could – the pattern has 1.5cm seam allowance and I think these have 6mm. I unpicked the centre-back seam at the yoke, including the top stitching and took a wedge, 1.5cm out of each side, tapering to nothing where the yoke meets the centre back. This was a bit of a guess but ended up working really well. This is first pair of jeans that have ever fit snugly at the back waist, and because of this I didn’t add the belt loops as I don’t think I’ll need a belt to hold these up.
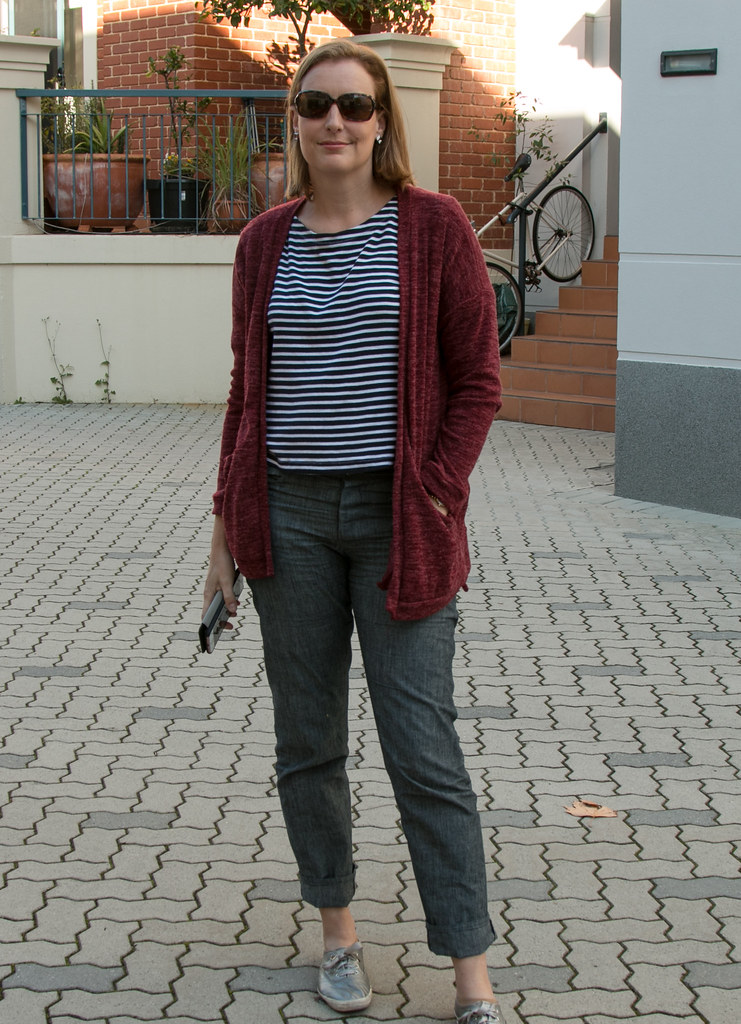
As for the side seams – next time I’ll add a centimetre onto the side seams of the legs and pocket pieces, but probably won’t go up a size as I’m pretty happy with the rest of the fit.
I know to properly match my inspiration pictures I should have taken to these with a razor and slashed the knees, but I don’t know if I can actually bear to hack at, and risk ruining, jeans I’ve made myself. I can’t try them on the store and return them to the rack if the look isn’t what I wanted!
Overall, it may be a bit boring but it’s exactly the outfit I wanted – and no shipping costs.
Thanks for reading – more sewing over at Hound’s Tooth.

Pingback: Where Anderson meets Alberta Street | The Monthly Stitch
So love the Madewell look! You have put it together perfectly!
LikeLike
Thanks Angie!
LikeLike
Fab outfit, my kind of clothes, jeans look great and are hard to get right so good job, well done
LikeLike
Thanks Lynsey!
LikeLike
I think this is a great look and all the pieces are super flexible for pairing with other items, which means you’ll get loads of wear out of them. Well done!
LikeLike
Thank you! Yes, I’m wearing the T-shirt again today – with a skirt.
LikeLiked by 1 person
Love the look. Clothes don’t have to be showy to get my approval! You’ve done a good job on those jeans – would you say they are a mid-rise jean?
LikeLike
I’d like to know too. They look great on you and am considering giving them a go myself.
LikeLiked by 1 person
Thank you! Yes I would say they are mid-rise, they hit about an inch below my belly button. Sorry there aren’t more close-up shots. I was in a rush to get this post done so the pictures were taken in a laneway at the back of my office, with the camera balanced on the roof of my car. I’m planning to put some more photos on my blog this weekend that show a bit more detail.
LikeLike
I just have to say: Those are pretty nice pictures for a timed, on-top-of-car camera! I’ve tried that before, so I know that it is not as easy as it sounds like it should be, haha!
LikeLiked by 1 person
No the car roof is not flat enough! 🙂 You can see in some of the pictures that the balcony behind me is tilting sideways quite a lot. As well as worrying that one of my colleagues was going to come along and ask me what on earth was going on, I’m not sure I’ll be trying it again without a helper.
LikeLike
Thanks, good to know that – I always find it is a critical thing to get the rise right. These sound ideal. Well done on the photos, I would never have realized they were “selfies”!
LikeLike
I’ve just bought the Morgan jeans pattern, it’ll be my first time making jeans so I was relieved to read they went together ok, yours look great 🙂
LikeLike
Good luck – it’s really satisfying to make your own jeans. I didn’t find this project any harder than anything else I’ve made – there are just more steps, but they are all very manageable. I also just used grey thread for top stitching and for the seams. I prefer that look to a gold or orange and it has the added bonus of not needing to change the thread each time, as there are a lot of double rows of top stitching in jeans.
LikeLike
Well done you. You should feel really proud of yourself for the whole look. 🙂
LikeLike
Thanks Miriam. 🙂
LikeLike
That is a really lovely outfit.
LikeLike
Thank you 🙂
LikeLike