
I pretty much sew indie patterns exclusively. For me, living in a small town where the nearest stockist of ‘Big 4’ paper patterns is a half hour drive away (and then there’s no guarantee they’ll have what I want in stock) indie patterns are just so much more accessible and easily available when the whim of ‘I MUST sew *insert garment* NOW” strikes. Also, because most indie patterns produce sew-alongs to support their patterns, I don’t have to print off instructions (or deal with a large, unwieldy instruction sheet.) I think indie patterns are tops!
For my entry to Indie Royalty I selected 3 patterns: Grainline ‘Cascade Dufflecoat’ – an untried, advanced pattern, Closet Case Patterns ‘Ginger Jeans’ – previously made but a time hog, and the Deer and Doe ‘Plantain Tee’ a TNT for me.
~GINGER JEANS
I started with the Ginger Jeans, thinking I’d get this one out of the way while I had time and assuming it would be an easy sew because of all the work that I had previously put into this pattern. Ummmm, NO! NO! NO! I’d cut them all out, completed the pockets and fly, sewed the inner leg seam and basted the outer leg seam to check the fit before finishing…They turned out to be a hot mess! Baggy in all the wrong places and the fly was giving me a strange front crotch pouch, again! I thought I had all these problems solved last time. Seething, I threw them into the furthest corner of my sewing room and moved on.
Unfortunately, I couldn’t come up with a replacement garment that I thought would work with the other two items I had planned so after finishing item 2 and 3, I returned to the Ginger Jeans and used some existing RTW jeans to help me diagnose the problems.
Pattern Review:
Ginger Jeans by Closet Case patterns (high waist, skinny leg) but between the changes I made this time and last time, they really don’t resemble the original pattern at all. I guess the pattern just doesn’t work for me and really the time that I’ve spent tweaking (that’s a polite way of putting it) probably outweighs the end result. That said, I do REALLY like this pair of jeans and I’m glad I pulled them out of the naughty corner. Also, one thing that is absolutely, freaking brilliant about this pattern is the sew-along. Easy to follow; they make sewing your own jeans achievable.

Size: N/A given the amount of changes I made. The very first pair I made based off my measurements were much too large though.
Fabric: Black stretch denim from The Fabric Store
Pattern Alterations:
The main fit alterations I made this time around were basically to narrow through hip and leg. I also raised the zip extension (not sure if this is the right term for it but it’s the part on the front leg that extends out to go under the zipper, it curves in at the base to meet the front crotch curve) to create a longer front crotch curve, meaning that the end of the zip didn’t finish so low down and my zipper was shorter. This stopped the pointy front pouch effect.
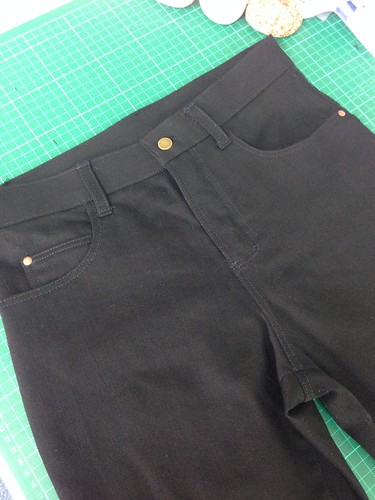
I also made two design alterations that I would highly recommend having a go at. The first one comes from Closet Case Patterns and is the pocket stay. While I do wear my other Ginger jeans, it bugs me that the pocket lining always peeps out – doing the pocket stay is a nice easy way of ensuring this doesn’t happen and it also makes the inside front very tidy.

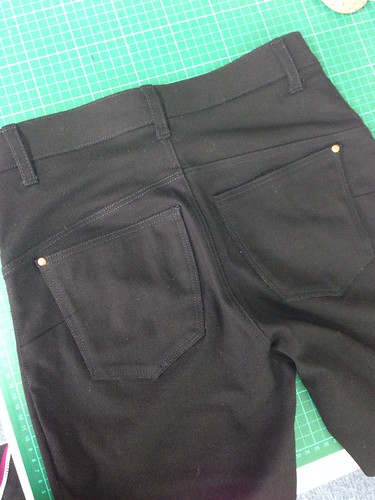
The second change is an inverted yoke that I learnt about while reading Sasha’s blog. Simply put, the back yoke is inverted and darts are added ‘mid bum’ to remove the excess fabric. The easy to follow instructions on how to do this are found here. I’m pretty convinced the effect of this is an uplifted bottom (although that may be wishful thinking) and it’s an alteration I’ll be making to all jeans/trousers with a yoke from now on.
~PLANTAIN TEE
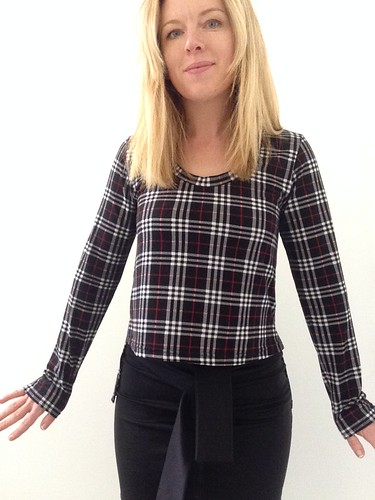
I entered this in the ‘Hack It’ competition, details can be found here.
~CASCADE DUFFLE COAT
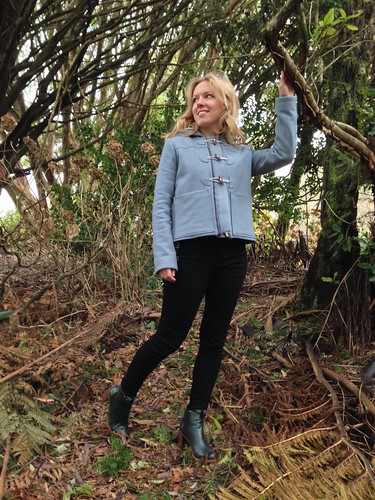
The decision to make this coat actually came from a dud, online fabric purchase. I’d originally intended on making a Tessuti Sydney Jacket, a pattern that requires non fraying fabric, the shops reply to my enquiry was that this fabric doesn’t fray, I purchased it, it arrives…it frays. But…I did love the fabric and adored the colour and I had been wanting to make myself a duffle coat for quite a while…NEW PLAN!
I was more drawn to the longer line cascade coat but I was going to be pushing it to make even the short version with the fabric amount I had (1.5m of 1.45 wide) luckily I enjoy a pattern layout challenge!
Pattern Review:
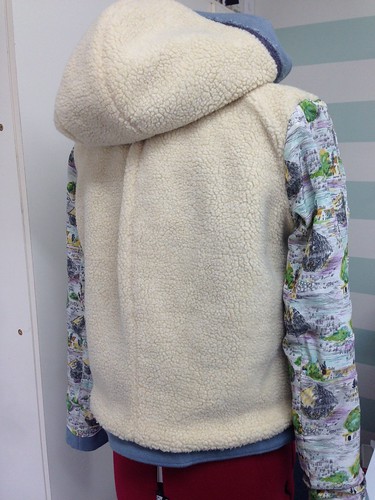
Cascade Dufflecoat by Grainline Studio. I can’t fault the pattern, everything went together beautifully. I would recommend following both the sew-along and written instructions as I found that some of the details that were missed out or unclear on one were made clear on the other and vice versa. I find all Grainline patterns to be long in the sleeves for me, which is not a change I usually have to make. I considered shortening these sleeve pieces but thought that for a winter coat a bit of overhang onto my hands would be adventageous.
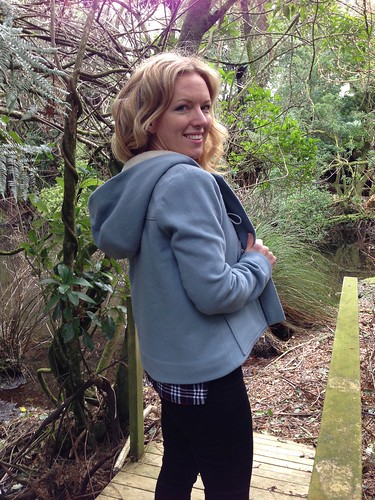
I absolutely LOVE this jacket! I especially love the large pockets (holds phone, wallet, keys and hands quite easily) and the hood. I have a thick head of hair and hoods usually fail to cover both my hair and my head adequately but the cascade hood is perfect – spacious without being overly so.
Size: 4, based on my measurements and I’m very happy with the fit. I can also fit a few warm layers underneath without feeling restricted in movement.
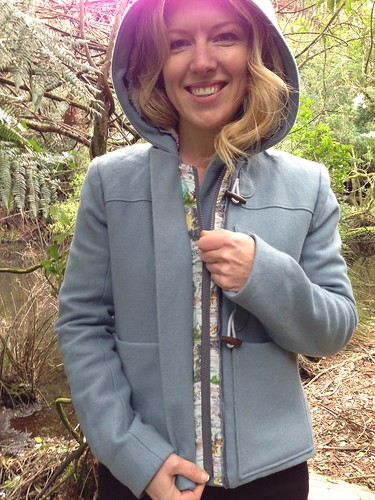
Fabric: Outer fabric is a wool blend from Backstreet Bargains (Hamilton, NZ) as is the Sherpa Fleece I lined the hood and body with. The other lining fabric is one from my stash and is a mystery fabric I inherited from my husbands Nana. It feels silky but isn’t silk. All other notions came from In Stitches (Stratford, NZ)
Pattern Alterations:
The pattern pieces are the same for both outer and inner hood and then there is also a hood facing. This means that the inner hood will end up slightly larger than the outer hood which is ok if a fine lining fabric is used. Since I was using fleece, I thought that this method would add too much bulk so I removed the excess (facing width minus seam allowance) from the fleece pieces so that the inner and outer hoods on my jacket were the same size
Details:
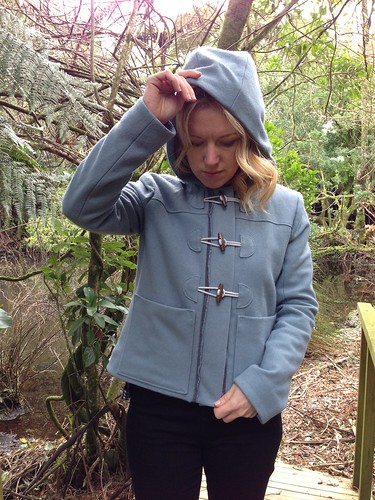
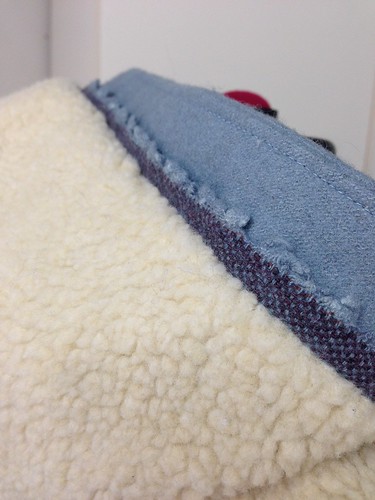
There are a couple of added details on my coat of which I am really proud of. The outer fabric came with a really nice selvage edge. It has a slight fringe look with deep purple/brown threads woven through the pale blue ones. I felt that those two colours really complimented each other and that it would be a shame not to use the selvage somehow. I finally chose to place it along either side of my zipper bands and also between the hood lining and facing. The insertion was quite simple, I just basted it in place along the 1.5cm seam line before sewing the pieces together as instructed. Coincidentally my lining fabric also has hints of the same purply brown colour.
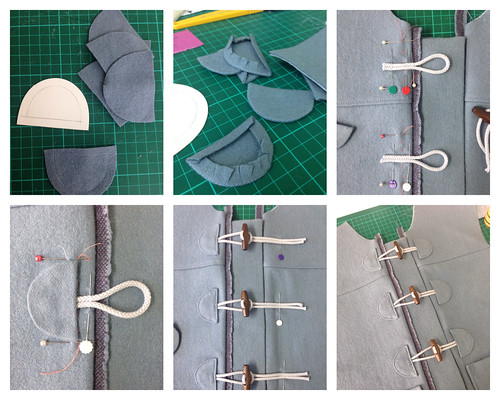
I felt a dark brown leather (to match my toggles) would be a bit too dominant running up the front of the coat and rather than try and locate a matching blue/grey leather I decided to make the toggle tabs out of my coat fabric.
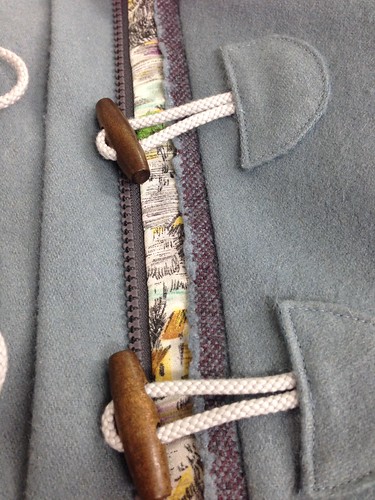
I used the toggle tab pattern piece and added an 8mm seam allowance around all edges. I then basted along this 8mm to give me a guideline for turning under the seam allowance. A good steam, press (some burnt fingers) and clipping of curves resulted in some neat little half circles. Then onto the rope closures. I did quite a bit of measuring and marking and basted these into place directly onto the jacket (instructions have you glue it to the leather.) I then used temporary spray adhesive to stick the toggle tabs in place on top and this worked wonders to hold them securely while I topstitched them in place. And ‘Tah-dah’ I think they look great.
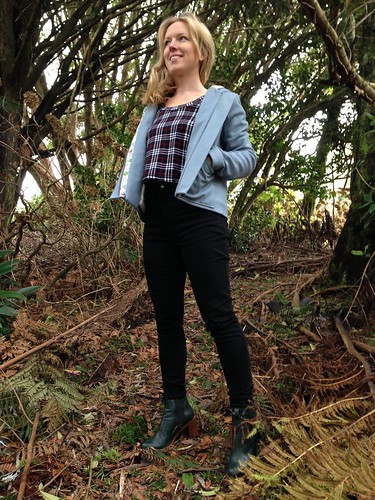
Final Say: I’m really pleased with how these three garments turned out (despite the heartache and headaches!) and think I’ll get a lot of wear out of this winter outfit.
Phew! Thanks for reading, if you made it this far!


Pingback: IPM2017: And the Indie Royalty contest winners are…. | The Monthly Stitch
These are so great Helen, major heart eyes!
LikeLiked by 1 person
Love your whole outfit Helen – it’s looks awesome and as per others comments, the duffle coat is fabulous!! Love that short version.
LikeLiked by 1 person
I’m happy one of us persevered with the ginger fitting! 😉 they look stunning on you (maybe burda trousers would work for you too?!). And that coat, can’t get over that coat, I loooove the lining. Totally awesome outfit!
LikeLike
Ahhh, yes, I should try Burda. I’ve sewn only one of their pants patterns before, back when I was a beginner and I think I remember them fitting quite well. The coat lining I tried to gave away several times in fabric swaps but none wanted it – I could never see it’s beauty or could think of a use until suddenly it seemed perfect for this project. Funny how things work out like that.
LikeLiked by 1 person
Well done for persevering with those jeans. I would have ended up making undies and wearing them as my ‘bottom half’ (!!!!) The top is great but of course the wonderful duffle coat is the star of the show. Beautifully made – all those great details and it looks fabulous on.
LikeLike
Haha! I would have been tempted to pose in undies but hypothermia would have quickly set in. I think the duffle coat will be with me for life 🙂
LikeLike
Darling coat! Good for you for sticking with those jeans! My naughty corner tends to get (ahem) forgotten.
LikeLike
I just couldn’t let the jeans beat me!
LikeLike
Omg that duffle is the best! Just the ticket for an NZ winter. Love the entire collection, but that duffle – oh my! Great work.
LikeLike
Thank you! Yup, I’m pretty much not taking this duffle off till November. Hehe!
LikeLiked by 1 person
I love your whole outfit! But that coat is gorgeous! So warm, comfortable just as cute as can be. I haven’t made jeans yet myself but I do have that pattern AND the ebook downloaded AND Heather Lou’s online course to make them too! I just keep backing away which is just silly 🙂 I’ve had a fantasy of owning a pair of jeans that actually FIT me for about 40 years! That’s sad isn’t it? Seeing yours and reading about your challenges gave me a sense of what I’m likely in for though :))
LikeLike
Thanks! I think I love the coat the most too – it’s working with almost everything in my wardrobe! It sounds like you are all set up and prepared to make jeans! I say ‘Go for it!’ There are quite a few reviews of the ginger jeans where the wearers have had to make few or no changes so they do work for some. I’d just keep the first pair basic and skip the details until you know the fit is right. Good luck!
LikeLike
Amazing sewing skills! Your finishing details are swoonworthy.
LikeLike
Thanks! I love adding crisp little details to clothing.
LikeLike