
Last September’s challenge was “Stick Your Neck Out”. Make something with an appealing collar design, whatever you like — but of course I took this quite literally, and made a few detachable collars! I’ve had them finished for ages but haven’t had the chance to take photos, as I don’t have a top with a high enough neckline to work with them. But I wanted to share them so just decided to use the one closest to working, and snapped some quick and silly selfies! And now I am FINALLY posting it here, thanks to Amnesty Day.
I’ve been wanting to try out some of these collar patterns for a while — I’ve made a Vogue dress with a detachable collar previously, but never just a collar on its own.
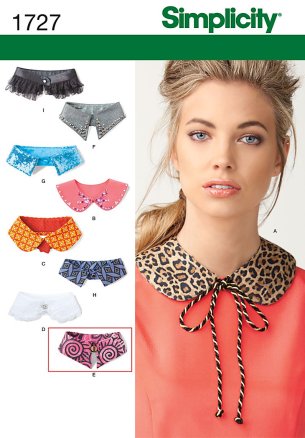
I started with Simplicity 1727, intending to try a couple of the views, but only got as far as View A. You can see that this one would require a neckline that fits quite snugly in order to work properly. This dress with a fairly high scoop neck isn’t high enough. But you get the idea…

The pattern is quite nice, although I did find that it’s quite small in circumference, suited for a narrow neck or a really high collar. It’s a bit too tight for me; I’ll be adding 1/2″ to the centre back the next go round so that it fits a little more evenly. I used a hook and eye closure instead of ties, but they aren’t quite even so I have to reattach the eye properly so the collar front lays smoothly. There are a number of other views to be tried as well.
However, the pattern instructions are useful, giving assistance in some techniques that will keep a flat collar like this rolled to the underside, including understitching the facing as far as you can, and I used these techniques on the next collar, which was a better pattern for me but with hardly any instructions — typical Burda! Here it is tied loosely to match with the edges of the neckline of this dress.

I found this pattern in the September 2017 Burda magazine. When I saw this I knew I’d have to try it, even if I didn’t like the way it was styled in the magazine, over another frilly neckline. Too much going on! I’d like to try a velvety black collar using this pattern though.
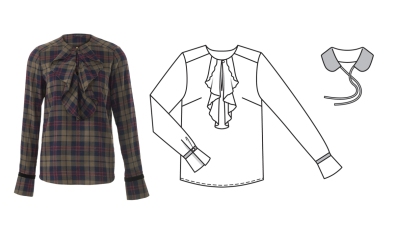
This one was a better fit for my neck; it’s the right circumference and I like the design. The only thing I realized after I’d finished was that once again I forgot to add seam allowances to my Burda pattern! Thankfully it still works on a project like this, it just made a skinny collar. I have retraced it and have plans to make another Burda shortly to test that out.
Tied tightly, pretending I have a full black background there….

The final one that I tried out was the free, downloadable Alva Collar from Named Patterns. I don’t have any Named patterns yet (not even the Alva), but thought I’d try out this free addition. It’s a different style of collar, as instead of tying or clipping at front centre, it has a button closure at the back. Imagine the ways you could personalize this shape.


I laid the tissue around my neck first to test it out and determined that I needed more length. I added in 3/4″ at each side, at around the shoulder, and I like it — but I’ve reduced the extra length to 1/2″ at each side for future attempts. It is just a smidge too long. But I really like this style and can see it done up again in many different ways. I was pleased with the design & the back closure; it works best of all of the designs so far.
These will be handy to add some spark to a bland tee or shift dress, for sure! I also have a very vintage pattern with some pretty wild collars to test out in future. Now that I’ve got started I am not sure I’ll be able to stop making these!

These are fabulous! What a great way to add personality to a plain black top. Thanks for the inspiration.
LikeLike