
I’m so excited to write my first post for The Monthly Stitch. Today I’m barely squeezing in my entry for the Dress week of Indie Pattern Month.
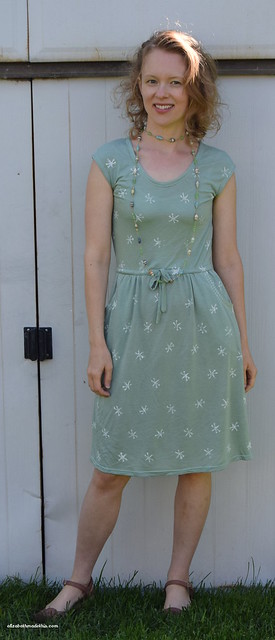
I started with Blank Slate Pattern’s Catalina Dress. I was originally drawn to it because I’m cheap when it comes to dresses, and I appreciate that this pattern requires very little in the way of fabric. For me, I’d way rather spend money on a 1 2/3 yards of fabric required for this vs. having to buy 3-4 yards of a poorer quality fabric required for so many dress patterns. If Liberty ever makes jersey in my color palette, this pattern will be the one I reach for.
As for pattern details, I love the cut on cap sleeves on this pattern. This kind of sleeve looks great on everyone and they’re so easy to sew. Also, the pockets are fantastic. Between the comfort factor and always need a place to stash my keys, a garment without pockets always makes me feel like I’m missing something. Surely I’m not the only one who has dropped keys on the ground because I was reaching for pockets that weren’t there.
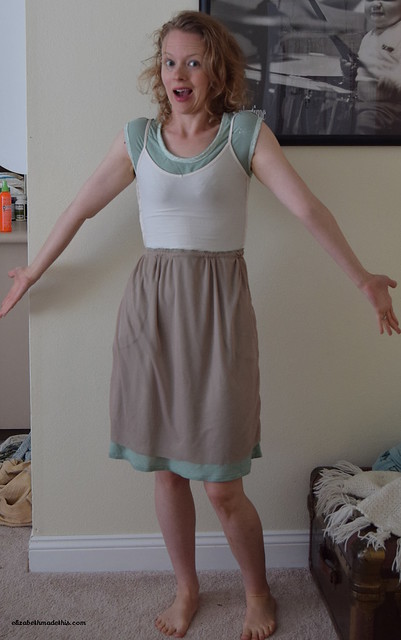
For my version of this dress, I started with a lovely green knit I picked up at Mood in LA last year. If I remember correctly, it’s a rayon cotton jersey. It’s got a great smooth hand, but it’s a little sheer as jerseys can often be. Thankfully, I had a thin mesh knit in my stash to line the skirt, and I cut up an old camisole to line the bodice, sewing the straps into the seam allowance of each shoulder where they intersected.
The dress came together easily due to the great instructions. I changed a couple of things from the instructions.
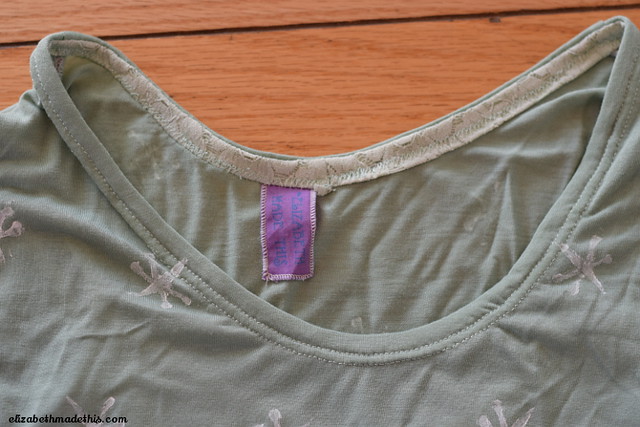
First, I bound the neckline and armholes with strips of stretch lace. The pattern calls for bias tape, which would work great if you made this dress with a woven. I chose the stretch lace because it was the perfect color and because bias tape would have shown from the right side due to the sheerness of the jersey.
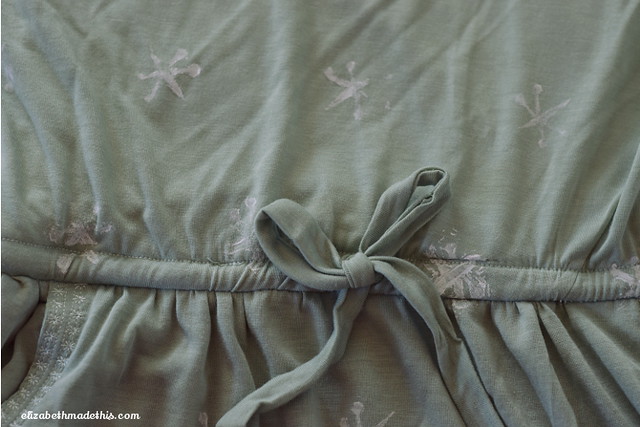
I also waited to trim the seam allowance on the waist seam until after I sewed the casing (which I sewed onto the bodice, not the skirt per the line drawing). Because I lined my dress, I was dealing with 2 extra layers of bulk, and I wanted to give myself more of a chance to actually catch all of the layers in the casing when I formed it by stitching from the right side. This worked out well.
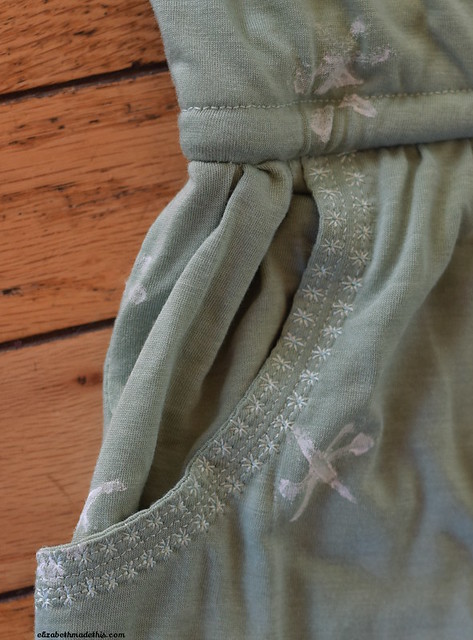
On the pockets, I sewed 4 rows of topstitching, two rows of straight stitches inside of 2 rows that used my asterisk stitch on my Janome. I like the added texture of the asterisk, and it plays into the pattern for my blockprint.
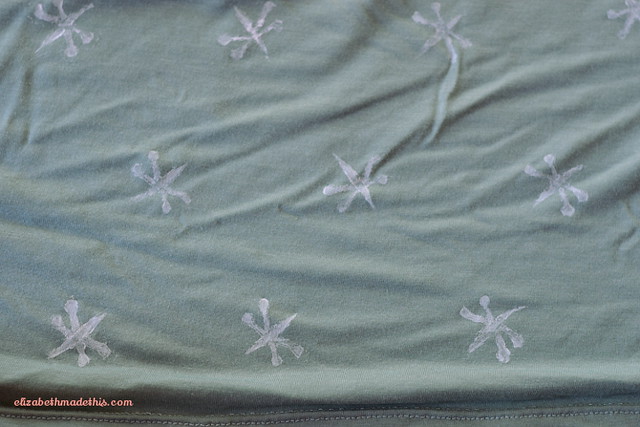
I chose to print my dress after I sewed it. I figured it would save me time in pattern matching across seams. I also had plenty of fabric leftover since this dress requires so little fabric, so I wanted to have unprinted yardage for other projects. Jun 3, 2015 at 6:34pm PDT
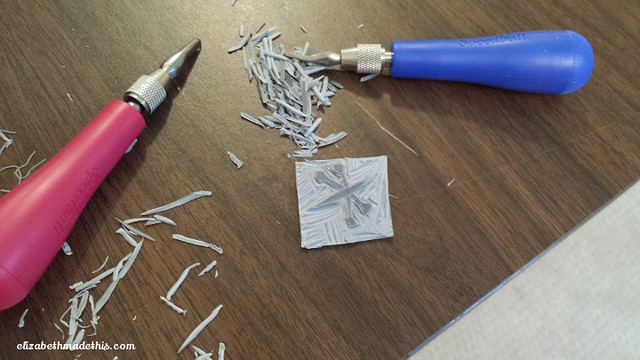
I carved a stamp of a jack from a small linoleum scrap and my Speedball cutters.

I set up a card table with a layer of old towels covered with a vinyl tablecloth for my printing surface. I stuffed the dress with strips of cardboard between the lining and the jersey. I painted white screenprinting ink with a small paintbrush onto the stamp to print each jack. I set a yardstick across my dress from left shoulder to the right hem corner as a guide then printed the jacks at 3″ intervals on either side of the yardstick. I offset each row so that a jack was roughly in the middle of the two jacks in the adjacent row. I kept moving the yardstick around the dress to get the successive rows, stopping for drying time as needed. I heat set the ink with my iron without steam.
The cardboard helped me get nice clear impressions. As a kid, I painted a lot of t-shirts with cardboard t-shirt forms and I always loved how the cardboard kept the fabric nice and stable as you worked.
The clarity got off in a few places, like the waist seam where there’s extra bulk, but for my first go at really printing on jersey, I’m happy with how it turned out.
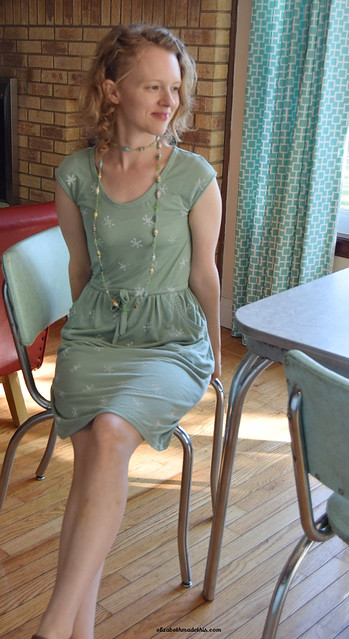
Mostly, I love how comfortable and girly this dress is. Why, oh, why haven’t I sewn more summer-friendly dresses like this?! And I’m so glad I decided to line it. It’s so nice to be able to grab a dress, toss on a scarf and go without having to bother with finding a slip/making sure that the slip doesn’t show/fiddling to get the slip to lay right etc.
For more on all of my sewing, you can visit Elizabeth Made This.

This pattern looks fabulous on you, I also like the stamping, very clever to do it after the dress is finished, looks most professional. Thanks for the step by step instructions!
LikeLike
Thank you! From a printing perspective, it’d be better to print yardage to get the clearest impressions, but as a seamstress, that means that you’re pattern matching. I decided to trade perfect impressions for perfect pattern matching this time.
LikeLike
Awesome! Love all of the small details!
LikeLike
Thanks! Details are what I look forward to adding always!
LikeLike
You’ve added some lovely details – the dress and colour suit you to a ‘t’
LikeLike
Thanks so much!
LikeLike
This color looks fab on you and I love the stamping you did on the dress it is so pretty 🙂
LikeLike
Thank you!
LikeLike
That is a wonderful dress. So cool and breezy looking, great for the hot summer that is coming.
LikeLike
Thanks! I certainly hope so! I hate heat.
LikeLike
Totally love this!
LikeLike
Thank you!
LikeLike
You did a beautiful job stamping the fabric! I love the colour and the pattern looks so good on you! x
LikeLike
Thank you! It was a fun project.
LikeLike
What a lovely dress and the printing makes it unique. Well done.
LikeLike
Thank you!
LikeLike
You should go back and categorize your post so that it is part of the dress contest. 🙂
LikeLike
Done! Thanks for the reminder!
LikeLike
I really admire your creativity making this dress. It is adorable and really suits you.
LikeLike
Thank you!
LikeLike
Wow, this is the cutest dress! I am really impressed with the creativity of the block print. Fabulous idea! I have block printed paper, but never fabric. I like the playfulness of the jack. I also really appreciate the pockets. I am always looking for a subtle way to use those specialty stitches. Your skill at keeping the decorative stitching neat and even on knit has got me jealous. Any secrets? I am also admiring the way you cowboyed the lining. Thanks for sharing all these great ideas.
LikeLike
I’m a topstitching nut. I topstitch everything, so I’m really well practiced at even rows. Certainly, using your feet with guides on them like a blind hem foot or a 1/4″ foot will help. Just let the guide ride along the edge of the fabric as you stitch and move your needle to where you want it to be to get the appropriate width. You can also use your seam allowance guides on your machine bed, but that’ll be trickier on curved areas. As far as topstitching on knit fabrics, I wouldn’t do it on a really stretchy area…or if I did, I’d use interfacing to stabilize it all. Also, when you stitch, don’t stretch the fabric, just go slow and let the machine pull it through.
LikeLike
Love the printing that you did – it really makes the dress something special!
Louise
LikeLike
Thank you!
LikeLike
The colour & style really suits you, and love the idea of printing onto the fabric after making the dress 😀
LikeLike
Thanks Thimberlina! It certainly makes for a simpler if slightly more awkward process.
LikeLiked by 1 person
Pingback: Blockprinted Catalina Dress - Elizabeth Made This